Considering a manual to power seat conversion? This guide delivers the professional insight you need. As a leading seat mechanism manufacturer, we understand the appeal of converting manual seats to electric. The gains in comfort, convenience, and customization are significant. However, this power seat retrofit is a complex technical project far beyond a simple swap. Our comprehensive overview details the genuine requirements of the conversion process, from core components and steps to critical safety and functionality considerations.
Part 1: Feasibility and Core Components for Power Seat Conversion
Before starting your DIY power seat conversion, a thorough assessment is critical. Not every manual seat frame can structurally support electric actuators.
- Vehicle and Seat Compatibility: First, verify if your vehicle’s platform had a factory electric seat option. If yes, a conversion using OEM-grade components is your most reliable path, typically requiring a full seat frame and internal seat mechanism replacement.
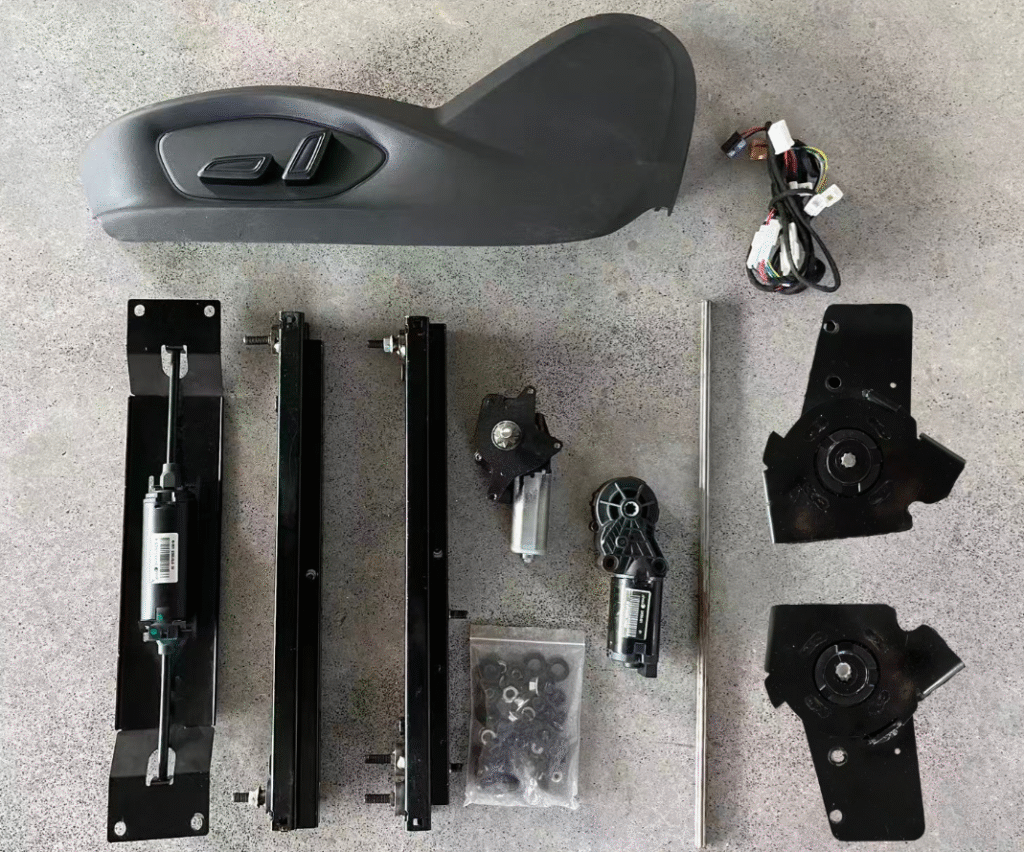
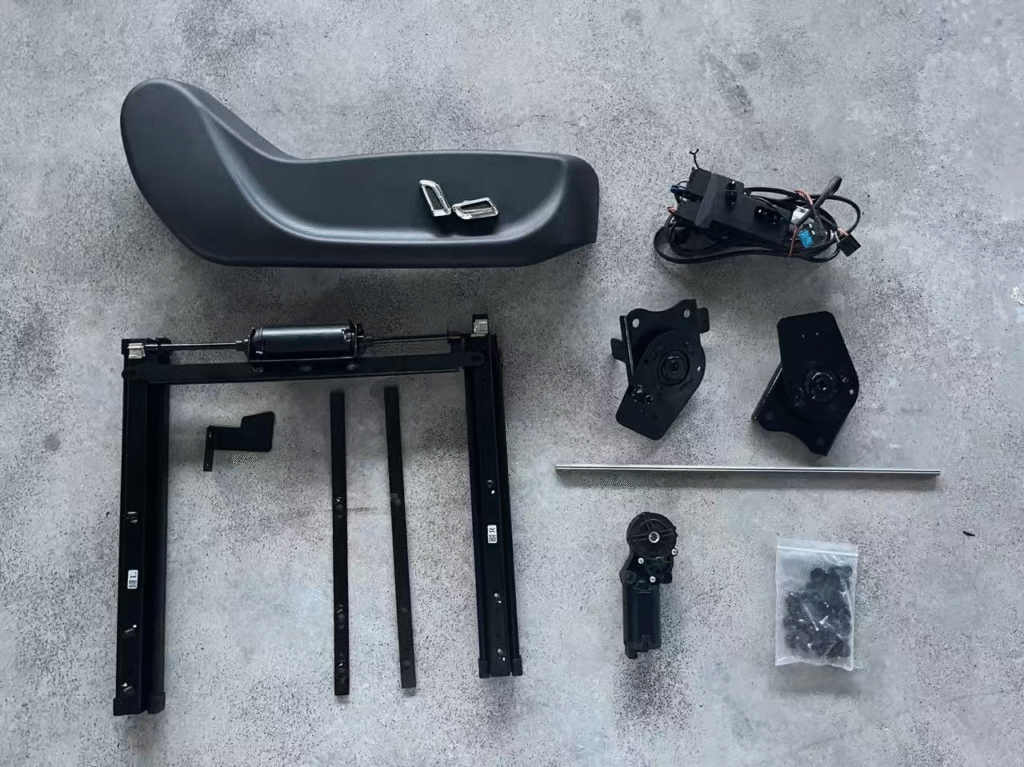
- The Essential Conversion Kit: A proper manual-to-electric seat upgrade requires an integrated component suite:
- Electric Seat Motors: These handle sliding, height, and recline. They must match the seat’s geometry and load.
- Seat Control Switch Pack: The user interface, mounted on the seat side or console.
- Wiring Harness and Connectors: A vehicle-specific kit to route power from the fuse box; often the most custom part.
- Supporting Hardware: Includes new drive shafts, gearboxes for the seat slide rails and recliners, plus all brackets and fasteners.
Part 2: The Power Seat Conversion Process: Step-by-Step
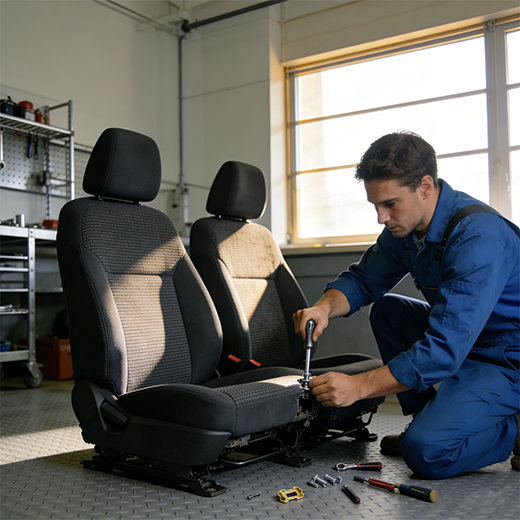
A successful electric seat conversion demands meticulous work. Follow this professional breakdown:
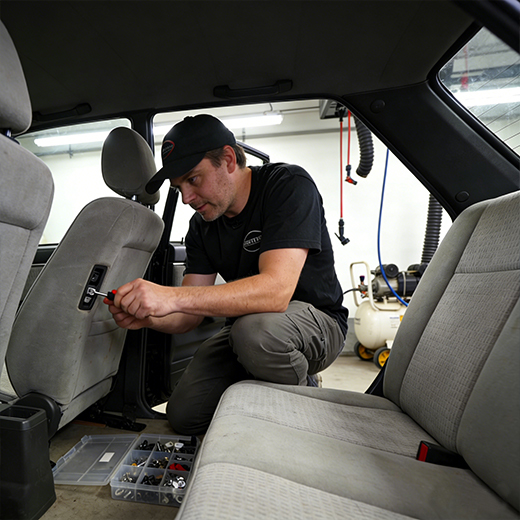
- Safety First and Prep: Always disconnect the battery. Then, remove the manual seat from the floor pan, disconnecting any electrical connectors.
- Seat Disassembly and Mechanism Swap: Remove upholstery to access internal mechanisms. Replace the manual recliner and adjuster with electric motor-driven units—this requires precision.
- Electrical System Integration: This is critical. Route the new harness through the floor, protect it, and connect it to a dedicated power source. Test all connections before powering on.
- Reassembly and Testing: After installing motors and wiring, reassemble the seat. Test all functions for smooth operation and full range, ensuring no wire interference. Re-install the seat with correct torque specs.
Part 3: Key Considerations for a Safe Seat Conversion
As seat component suppliers, we must highlight the real challenges and risks of DIY seat conversions.
- Safety and Liability: The seat is a safety-critical component. Improper installation risks structural integrity, crash performance, and integrated airbag function, potentially voiding warranties and insurance.
- Integration Complexity: Modern vehicles use complex networks (CAN bus). Adding features like memory or heating may require more than 12V power and demand specialized programming.
- Cost vs. Benefit Analysis: Factoring in a quality conversion kit, professional installation, and potential issues, total costs can rival or exceed sourcing used OEM electric seats—often a more integrated and reliable option.
Conclusion: Achieving a Reliable Power Seat Retrofit
While enticing, a DIY electric seat conversion is a demanding project requiring mechanical skill, electrical knowledge, and safety awareness.
For a reliable outcome, we recommend one of two paths:
- Source Complete OEM Seats: Find electric seats from your same vehicle model and generation for a plug-and-play upgrade.
- Hire a Specialized Shop: Professional installers have the expertise, tools, and access to proper retrofit components to ensure a correct and safe conversion.
As a seat adjustment system manufacturer, we provide high-quality mechanisms that make such enhancements possible. By understanding the full scope, you can make an informed decision to successfully convert your manual seats to power.